Wednesday, April 16, 2014

Review: Belay Shades Belaying Glasses

Review: Belay Shades Belaying Glasses


Today we set our steely, Eastwood-esque gazes on a really interesting product that I don't think many people have been exposed to: belay glasses. Belay glasses are pretty ingenious. They are regular glasses with the lenses replaced with upward-pointing prisms. The prisms bounce light from above you into your eyes. Your optic nerves sends the light into your brain, which interprets the light into an image of your sweaty climbing partner spending 45 minutes projecting the crux moves of a "totally sandbagged" 5.11a. C'mon dude, the sun is setting. Belay Shades are designed to protect the belayer's neck by preventing them from having to keep their head pointed up while they watch their climbing partner. It's a low-tech gadget with big benefits.

Belay Shades getting their moment in the sun. Owens River Gorge, CA.

We've been wanting to try these for the longest time and finally got our chance. Belay glasses have been around for a while in various forms. We've heard of old school climbers making homebrew pairs out of busted sunglasses and mirrors from their girlfriends' makeup kits. Belay Shades are a streamlined, evolved version of this. It's a high quality product and despite the fancy optics, pretty rugged! As you all know, we here at Rugged Innovations are decidedly unkind to gear. Why? Because we take big falls all the time, and expect our gear to be able to keep up with us. It's a reasonable expectation for high-performance gear and we push it to the limit.

Belay Shades are tough little suckers. We wore them off and on for about 5 hours in Owens River Gorge while belaying some friends. We also dropped them several times and were generally pretty irreverent with them -- it's not our job to babysit gear. They didn't scratch, scuff, bend, or break. We all gave them a whirl and loved the ability to keep our necks attached to our body during a long belay session. These guys save your neck, I'm telling you. Anyone who's belayed for an hour or more at a stretch can tell you it's brutal; by the end of it you are moving your head into all kinds of weird positions to try to use different muscles. Belay Shades 100% alleviate this issue for sport cragging. 
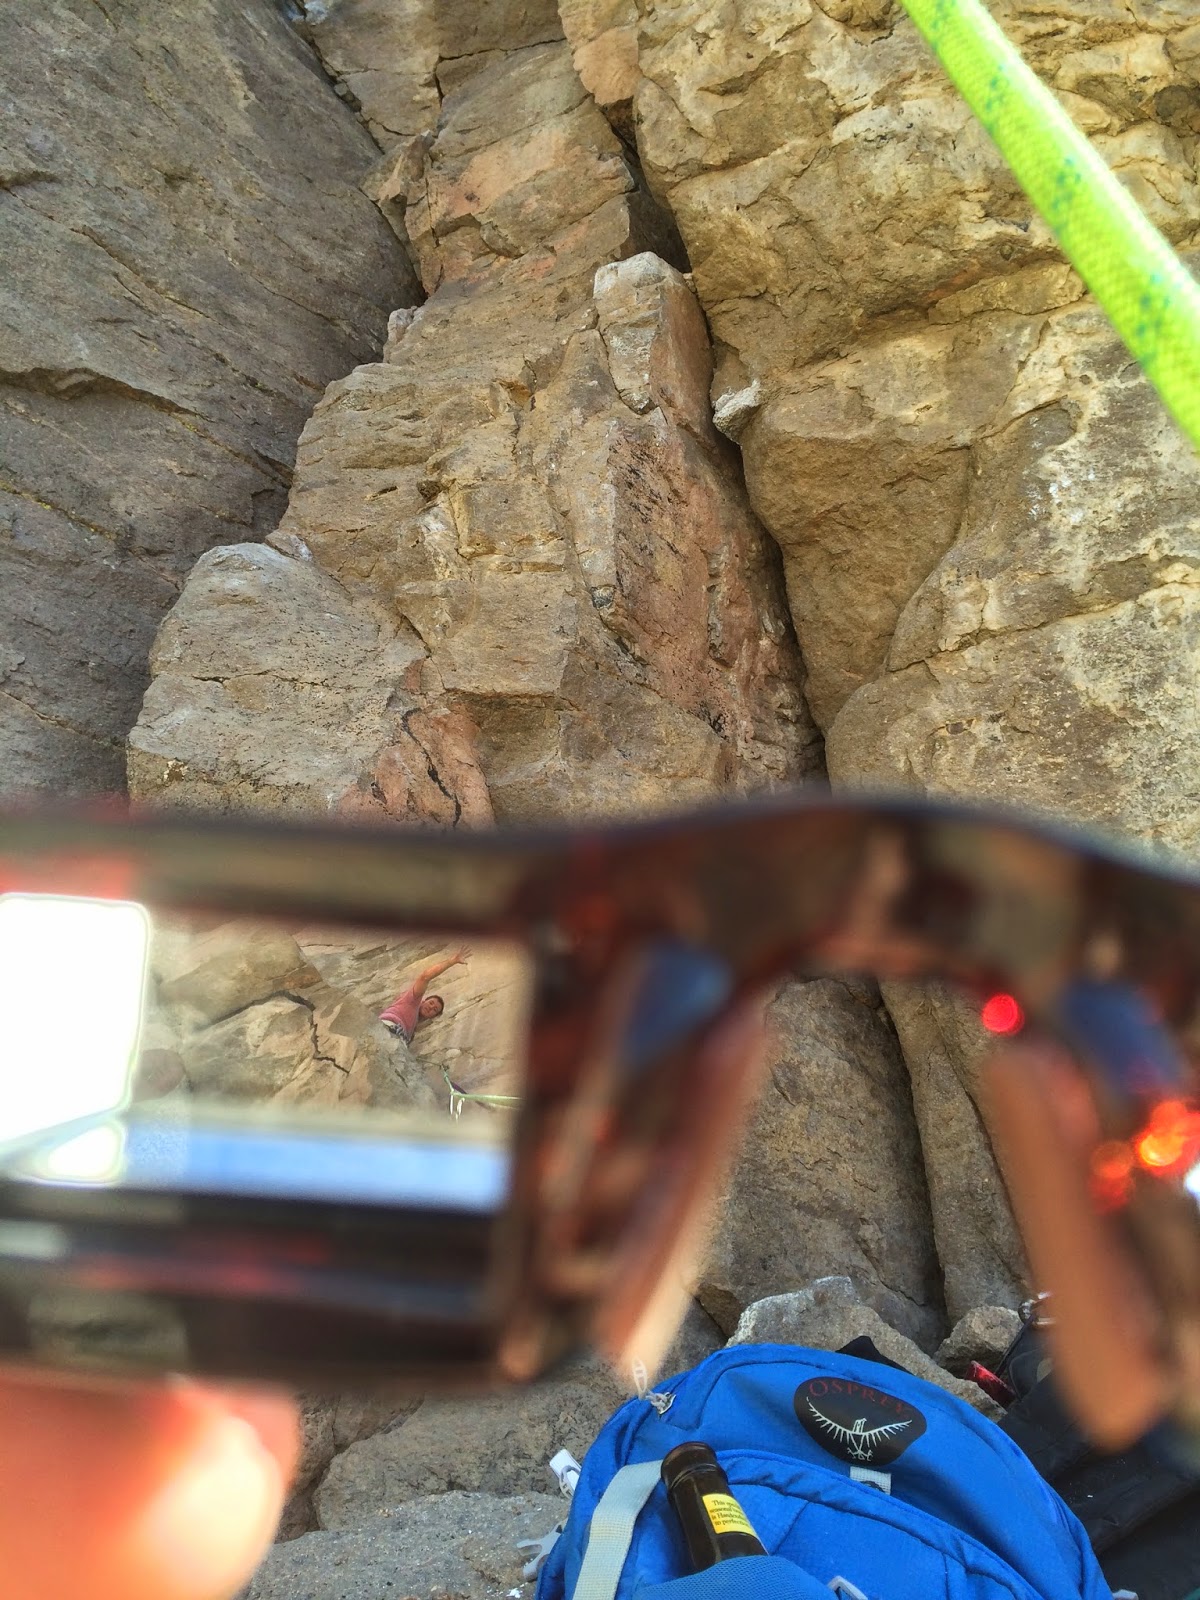
Objects in Belay Shades are stronger than they appear.
Belay Shades are unique for a couple of reasons. One thing we like about them is that they use prisms and not mirrors. The prisms can't bend, move, or get out of alignment with respect to your object of focus. The optics have no moving or folding parts to calibrate. Another thing we liked about Belay Shades is that they are built out of real glasses. If you look at the belay glasses made by other companies, they are constructed out of cut aluminum pieces and end up looking like Robocop's snorkeling equipment. Belay Shades are made out of glasses -- actual human glasses. Belay Shades are, in my opinion, the least dorky belay glasses on the market. No one is going to win fashion awards when they're wearing any belay glasses, but Belay Shades are the least obtrusive.

These Belay Shades are incredible for sport projecting. They completely eliminate the sore neck issue because you don't have to look up at all. You can have a clear view of your climbing partner the whole time while having a clear view of your immediate surroundings.

Having said that, there are a few considerations when wearing Belay Shades. The most obvious is that when you are wearing them, you can't see what is directly in front of you without moving your head around a bit. This makes them not necessarily appropriate for multipitch climbing where you have to keep an eye on your anchor and make small adjustments often. They also are not great to wear for really long periods of time. I got a bit dizzy after wearing them for about an hour straight on a really, really long pitch we were working. Then again, if your climbing partner is spending 60 minutes on the wall, you should probably consider getting them a sponsorship or introduce them to endurance sports.

We have to say, we love the Belay Shades ($44.98 at their site). They are exactly what you want from a pair of belay glasses and then some. They come with a cloth carrying bag, a beefy padded hard shell protective case, a cord to hang them around your neck when you're not using them, and a little microfiber cloth to wipe them down when you inevitably kick some dust up onto them. It's quite a package, but the product itself is what sells it for me. They protect your neck during long belay sessions and are, in my opinion, the best option on the market. We dropped them a few times on rock surfaces from about waist height and the lenses had nary a scuff. Verdict: rugged as heck. For serious sport climbers and single-pitch tradders, these are pretty game-changing. Once you try them, you will not want to go sport climbing without Belay Shades!

Have fun!

Ariel
Rugged Innovations

Monday, March 31, 2014

The Best Beginner Climbing Shoes: Low Price and High Quality

The Best Beginner Climbing Shoes: High Quality, Low Price

There are lots of different types and styles of climbing, but climbing shoes are a universal fact of life. Unless all you do is ice climb, you're going to need some rock shoes. We've reviewed a lot of shoes here and there are many great options, but as a beginner climber there are a few facts of life that should guide your decision. 

Price

The cost of gear is a concern to all of us. Climbing ain't cheap. As a new climber, you're going to destroy your gear until you learn proper climbing technique and develop good habits for taking care of your stuff. Even if you can afford to drop some serious cash on climbing shoes, I really don't recommend it for your first pair. 

New climbers who are still learning footwork are going to heavily favor certain stances. Because of this, they tend to quickly wear out and rip through the rubber in specific areas of their shoe, like the toe. I've seen this happen to a lot of people and unless you're gifted or great on your feet, you should probably consider your first pair of shoes to be essentially disposable. I do not recommend you go out and spend $150+ on a pair of 5.10 Blackwings or La Sportiva Miuras. You are going to destroy them and waste your money. I really recommend your first pair of shoes be a very modest pair of shoes. If you can find a pair of hand-me-downs from a climbing friend, give 'em a shot if they fit you. You can ask around at your local gym or put up a flier, check Craigslist, or go to the annual REI yard sale.

If you want to pick up a new pair, there are plenty of affordable options. Technology has advanced so quickly that you can get an incredible pair of shoes for less than $100. In my opinion, one of the best options is the Five Ten Coyote VCS ($68.98 on Amazon) -- the gym nearest to me uses these as their rental shoes and I've worn them many times. These are the best value climbing shoes I've tried, hands down. The quality on these shoes is incredible for being ~$70. Even on the worn-out rental models that have been used and abused by hundreds of people, they perform well. They hold an edge and have a great stiffness support in the arch. Most importantly, they're comfortable! You really can't go wrong getting a pair of the new 5.10 Coyote VCS.

Fit

One of the most important element of climbing shoes is fit. Because of this, I definitely recommend you try before you buy. There is no industry standard for climbing shoe sizes between manufacturers, meaning that a size 7 from one company can feel like a size 10 of another. The only way to know is to try them on. If there's an REI or EMS in your area, go into the store and try on a few different pairs. Many climbers choose shoes that are a few sizes down from their street shoes, but this is not something you should worry about as a newbie. Get a pair that fits you perfectly. Keep in mind that climbing shoes are supposed to be tight, but if they're really tight, you're going to be in so much pain that you won't be able to learn fundamental footing technique.

The shoe should feel snug everywhere, but not constrict your toes or pinch when tightened. Certain shoes have a heel cup that balloons out and leaves a little air pocket, creating a gap between your heel and the inside of the shoe. This drives me crazy, but a bunch of people don't seem to mind because it's a characteristic of one of the most popular rock shoes ever. This may not be a concern to you, but it's worth examining to determine your preferences.

You may have noticed that some rock shoes have a steep downturn starting at the heel, driving through the arch, and continuing to the toe. These shoes are meant for precise, strong footwork on hard, overhanging routes and boulder problems. The amount of downturn on a shoe is referred to by many climbers as its "aggressiveness". As a new climber, you probably won't need an aggressively downturned shoe. In fact, you probably don't need any downturn at all.

As you advance and get better at climbing, you may find yourself gravitating towards tighter shoes to improve the mechanical advantage (wiki) of your feet relative to surface area of the foothold. In the past, climbers would downsize heavily to compensate for the amount that rock shoes would stretch over time. With current advances in material sciences, heavy downsizing is not necessary to ensure a good fit. Let me be clear: only downsize heavily if you know exactly what you are doing. Let me be more clear: new climbers do not need to downsize their shoes. Get a shoe that fits. 


Durability

You might as well accept that you are going to absolutely mangle your first pair of shoes. The toe is going to blow out way before you are ready to spend another ~$100 bucks. That said, not all shoes are created equal, and some shoe rubber is way tougher. 

In my experience, the best shoe rubber is used by La Sportiva. I've had two pairs of La Sportivas and the rubber is crazy good. It's just unbelievably long-lasting. I've had the same pair of La Sportiva TC Pro shoes for almost 3 years without blowing a toe. I've taken it up (and back down) thousands of vertical feet without even a slight cut in the rubber. I really can't say enough about it. I am constantly impressed by it. 

Five Ten is also known for its really grippy and long-lasting Stealth C4 rubber. I have worn a few pairs of 5.10s and I appreciate their longevity. Evolv, on the other hand, has horrible rubber in my experience. I had the toes on a pair of Evolvs blow in the first week of owning a pair. On a separate pair, the edges wore out within 3-4 months and are now totally rounded. 

How to Choose Your First Climbing Shoe

First things first! Determine your budget. If you're broke, ask other climbers for their hand-me-downs. Most people who have been climbing for a long time have a trashy pair of old shoes in the garage. You can probably get an old pair for free or very cheap. Keep in mind that there's a reason why those shoes are under a pile of shovels and rakes in the garage -- they either suck or are totally destroyed. Beggars can't be choosers, though! Rock climbing gyms often have a corkboard where people put up classified ads. You might be able to find a great deal for under $50 there!

If you're willing to pony up a little more, you can find all kinds of great shoes. My favorite beginner shoe by far is the Five Ten Coyote VCS ($68.98 on Amazon). It's a durable workhorse shoe with serious edge potential. These shoes will grow with your climbing skill.

For a little more money, you can pick up La Sportiva Tarantula (price varies on Amazon). La Sportiva's rubber is known for being long-lasting and durable. This is a slightly longer-lasting shoe that will also keep up with you as you advance your climbing.

Hopefully you have the resources now to make an educated decision about your first pair of climbing shoes. Shoes are an important and highly personal element of climbing. Experiment a lot and see what works for you!

Ariel Castro
Rugged Innovations

Monday, March 24, 2014

Review: Osprey Manta 20 Hydration Pack

Review: Osprey Manta 20 Hydration Pack

Whether you live and breathe all-day multipitch trad epics or prefer to spend those hot, sunny afternoons projecting huge boulders, one thing is clear: you better bring some water. Hydration is critical to your performance as an athlete. 

We picked up the Osprey Manta 20 Hydration Pack recently and have taken it on three big trips so far -- a multipitch adventure in Red Rock Canyon, a sport climbing day in Owens River Gorge, and an afternoon of bouldering in the Buttermilks. We put some serious miles on this backpack, both vertical and horizontal. Here's what we found.

Osprey Manta 20 Hydration Pack
Osprey Manta 20 Hydration Pack camping in Owens River Gorge
One of the first things you notice about the bag is the quality of workmanship. From the seams on the zippers to the rough ripstop material; Osprey has put a lot of thought into making this backpack. It feels like you could drop it off a cliff and it would be waiting for you at the bottom without a scratch. It's just solid. 

Osprey Manta 20 Hydration Pack and Dog
Dog for scale.
The bag is covered in features. The front of the bag has loop zippers instead of pull tabs, which make opening easier. The zippers have exterior plastic seams, which protect them from warping and increase water resistance. The top front has small loop for mounting your helmet, a mesh pocket with snap closure for quick access goods, and a cinch for holding ski poles if that's your thing (I use it to strap down a light sweater for when the winds pick up). The hip belt has pockets on either side for snacks, cell phones, etc. The very front pocket has a key clip and separate mesh compartments for small goodies. The chest strap has a magnetic clasp for attaching to the hydration hose that is great for keeping the hose free of your hands but accessible when you need it. The only problem with the magnet here is that when you put the backpack on the ground, it picks up small iron and metal flakes from the dirt. After a day of bopping around in the desert your magnet is covered in metal flakes. 

Osprey Hydraulics 3 Liter Reservoir
Osprey Hydraulics reservoir
The 3-liter "Hydraulics" water reservoir is unique and of much higher quality than any Camelbak or other brand I've ever seen. The back-facing side has a stiff internal frame that matches the inside of the backpack like a puzzle piece. The internal frame of the water reservoir keeps it snug and distributes the weight more evenly along your back than a Camelbak hydration sleeve, which just reverts to a long cylinder and slides around inside your backpack. My one complaint about the water reservoir is that it can be a MONSTER to get open. Maybe some sand got into the thread of the cap of it? It's hard to open, even for a climber... and hand strength is kind of our thing. It will test your pinch strength, that's for sure. Another small nitpick is that if you forget to move the mouthpiece into the "locked" position, it can drip a little. Just don't forget.


Osprey Manta 20 Hydration Pack with Helmet
One Manta 20 please, on the rocks
The back panel is brilliantly designed. There's a curved internal frame with ridges that allow airflow and then an inch-deep space followed by a tight mesh that touches your back. The result is a small meshed window between your back and the bag that allows air to flow freely and keep your back cool. Bicyclists take note!

There are several straps that are used to cinch the bag down closer to your body. This is designed to lower the surface area of the bag to reduce wind resistance and to keep the weight of the bag closer to your center of mass which increases your stability. I've noticed that you can also use the straps to clip other items to your bag. I like to cinch my helmet down close to the bag so it doesn't bounce around. 

There is a rain cover hidden in a secret compartment in the bottom. It takes about ten seconds to deploy and has the added advantage of being bright red -- great for visibility on the cloudy, dark days when you'd be most likely to need a rain cover. It's removable, which is great because we live in Nevada where yearly rainfall is usually around ten inches and the days when it does rain are usually just a light sprinkling. Nevadans just don't really need rain covers. Still, the rain cover is a nice detail and I can see it being quite handy in weathery areas. 

Osprey Manta 20 Hydration Pack Rain Cover
Deploying the rain cover on the Osprey Manta 20 Hydration Pack

Bottom line: 

The Osprey Men's Manta 20 Hydration Pack ($139 on Amazon) is about as advanced a backpack as I have ever seen. It packs so many useful features into 1220 cubic inches that it will take you a few days just to figure out how to use it to its potential. As a climber, the pack's main pocket is just big enough to hold a pair of climbing shoes, a harness, and chalk. If you're planning on using it for more than a basic climbing day, you may want to upgrade to the Osprey Men's Manta 28 Hydration Pack ($149 on Amazon) or the Osprey Men's Manta 36 Hydration Pack ($159 on Amazon), which are only slightly more expensive but hold much more. The pack's water reservoir holds three liters, which is enough to keep one person hydrated for a full day of hard athletic activity. I highly recommend this bag for trad climbers that need a lightweight day bag, boulderers who are looking for a all-in-one session pack, and bicyclists who want a low profile hydration bag for long rides.